 I've just built my first snare drum, and I've now posted my first blog entry. I think the drum's real perty. It's made of cocobolo wood, plus all the hardware I ordered from BestDrumDeals.com or some such clearinghouse. There's lots of pics here, and some explanation to boot. I've officially geeked out, as you'll see. In the pic above I'm preparing to route the outer diameter template.
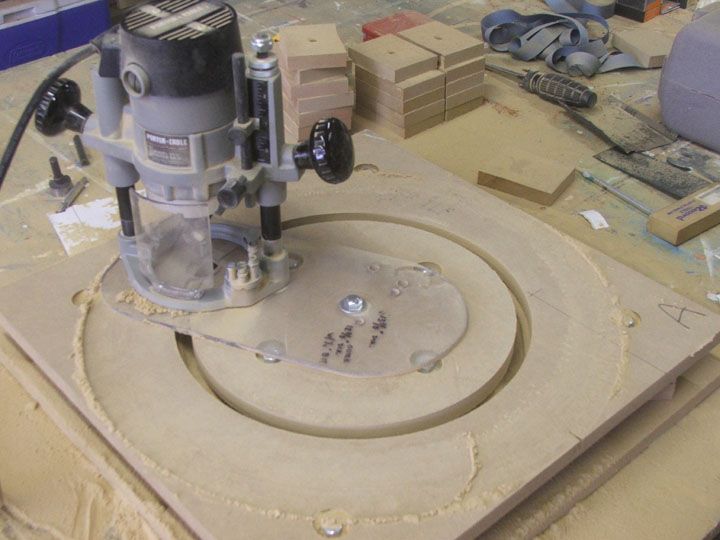 Outer diameter template routed.
 Test stack of shell segments. Sorry, forgot to photograph my table saw sled/jig which helped me miter and cut to length each segment. This is a 14" snare drum with 10 lugs, so I decided to use 20 segments per layer or course. Each piece is 2-1/4" long on the outside face, and each end is cut at a 9 degree miter.
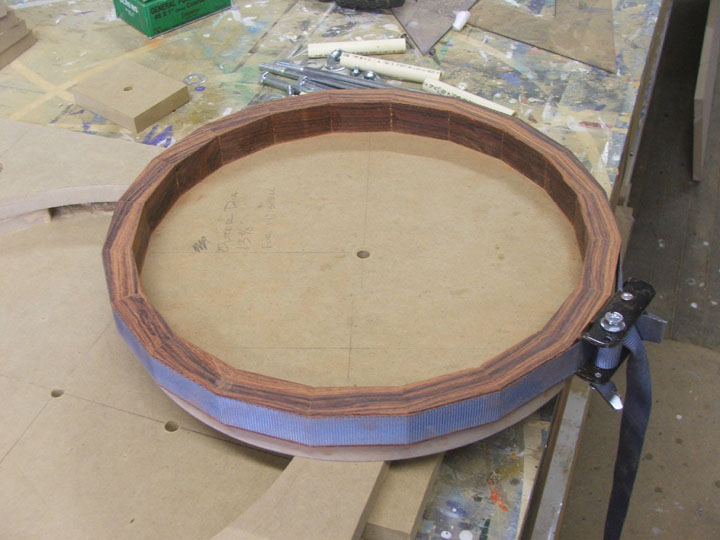 Gluing first course with band clamp. Although end-grain-to-end-grain glue joints are not strong, I needed some way of holding the segments together before gluing the second course to the first. The face grain joints that join each course to the adjacent ones are what really holds this thing together.
 Here I've routed one piece of the stackable platform I used to guide the router during machining operations.
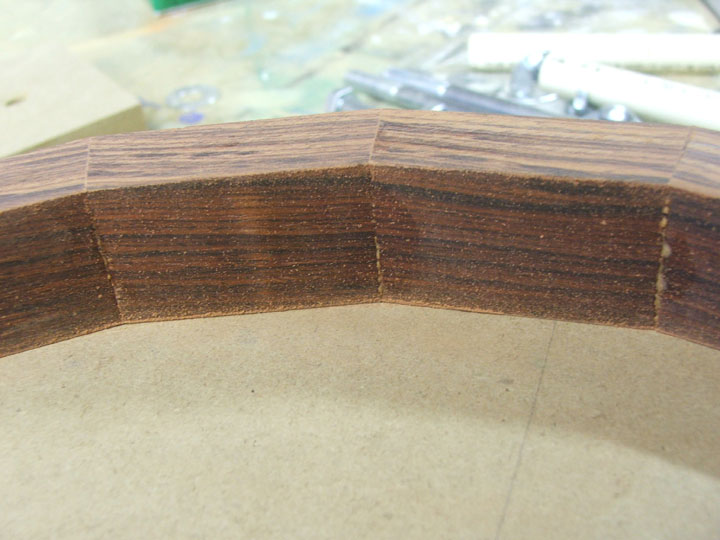 Closeup of segmented glue joints.
 I used a flat pattern cutting bit to machine top surface of each course flat and parallel to its other face. Router base rides on top of MDF platform to maintain flatness.
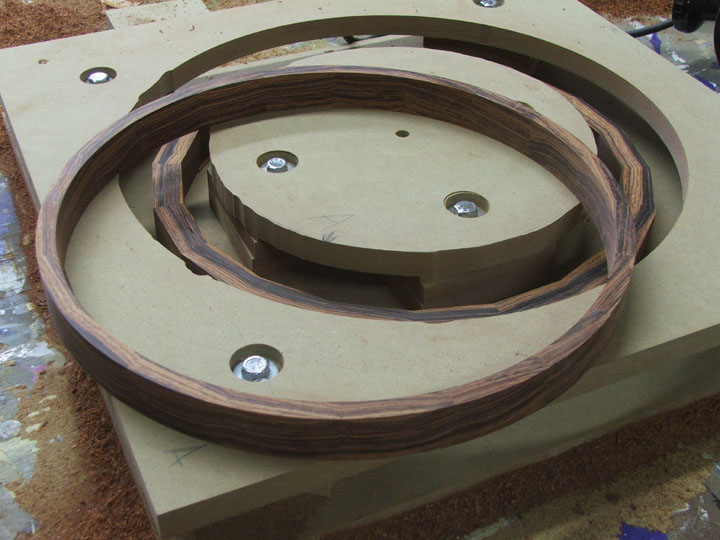 First course has been machined flat and circular. Second course sits on platform waiting for machining. I used high-tack double-stick tape, similar to turner's tape to hold each course down to the bottom of the platform during machining.
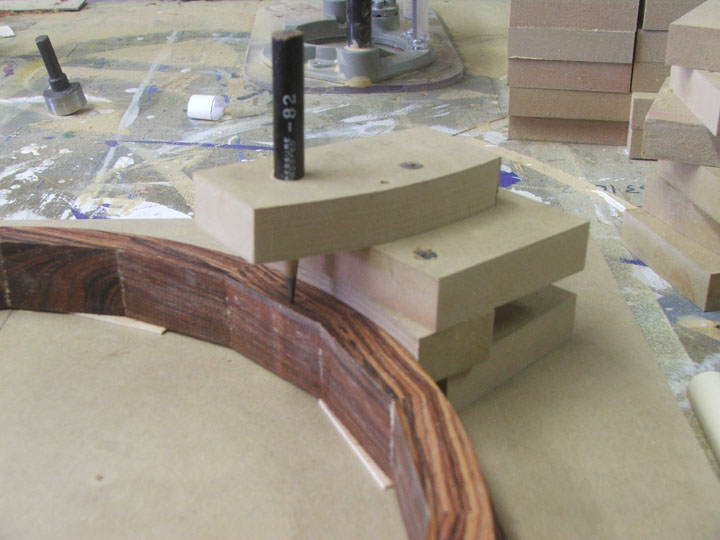 Marking gauge I used to help me center the outer diameter template on the first course.
 First course, fully machined, glued to second course. Next I used a flush trim bit to cut the facets off the second course and cut it into a circle while following the contour of the first course. Thus each subsequent course maintained an accurate relationship with the one below. I continued this process for all five courses. If you look closely you might be able to see that I've staggered the "head joints" between the two courses.
 All five courses glued and machined.
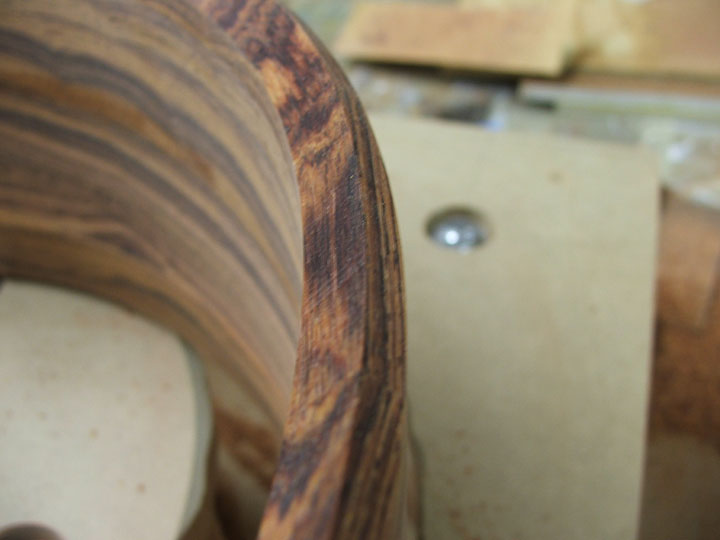 Closeup of the bearing edge, a 45/45 degree cut, biased toward the outside of the shell. In other words, the edge itself is closer to the outside of the shell. This is the standard style of edge for modern drums, allowing fairly easy and accurate tuning.
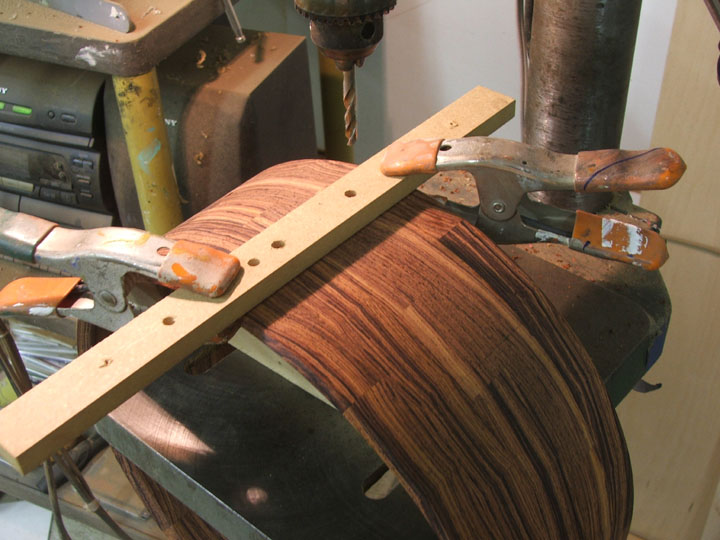 Jig for drilling lug holes. The tube style lugs I chose mount with two holes each.
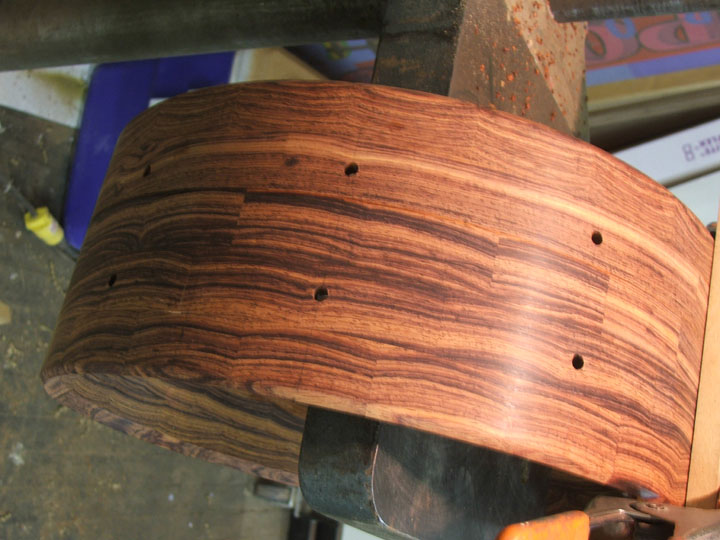 More lug holes.
 Shell fully drilled and ready for final sanding and finish. I went over the whole shell with 320 grit paper, using sanding blocks shaped to the inner and outer profiles of the shell. Sorry, no pics. Maybe later. Not that interesting anyway. Just sanding.
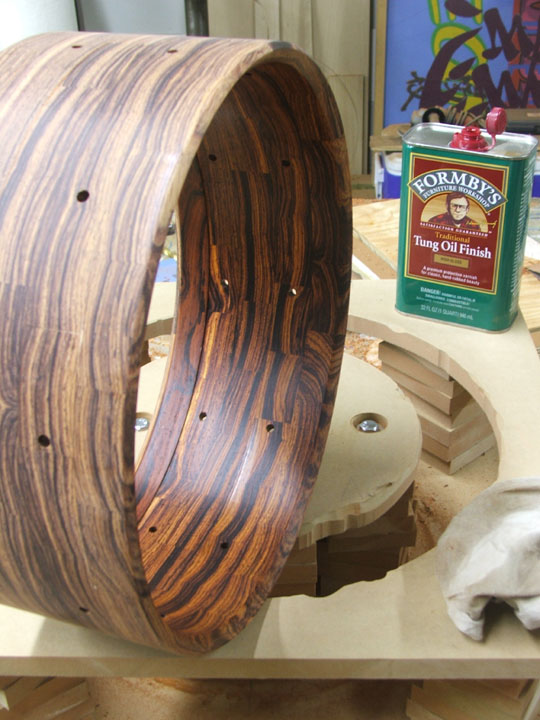 Inner shell surface with one coat of finish rubbed in. I chose a basic mixed tung oil and varnish finish from the hardware store. I don't have much patience for finish work and I figured this would look pretty good, considering the rather oily nature of cocobolo wood. It hardly needs a finish at all, but the oil helps to bring out the warmer reddish colors in the grain.
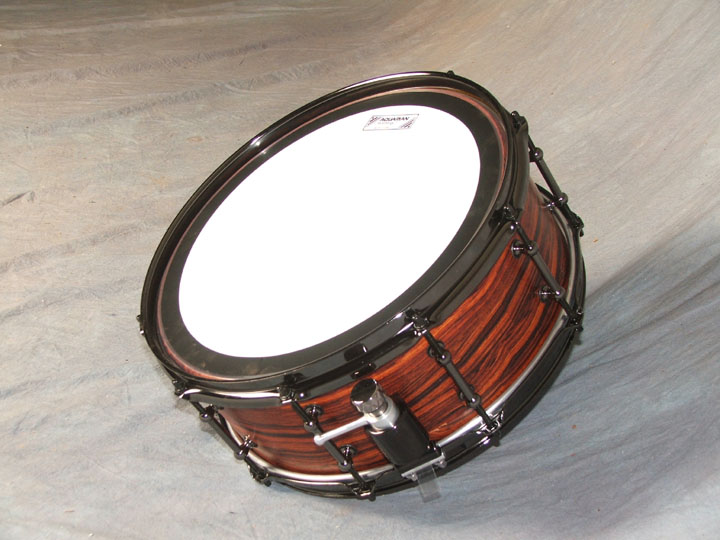
Fully assembled.
 Snare side.
 All dressed up and ready to rock. Such is the nature of geekdom.